 how-to
How to Thaw Frozen Pipes Safely
Table of Contents
- Identify the Location of Your Frozen Pipe
- Tools and Equipment for Thawing Frozen Pipes
- Step-by-Step Process to Thaw Frozen Pipes Safely
- Signs of Frozen Pipes You Should Not Ignore
- How to Prevent Pipes from Freezing
- When to Call a Professional Plumber
- Frequently Asked Questions
Last Updated: September 20, 2026
Identify the Location of Your Frozen Pipe
To thaw frozen pipes and prevent serious problems, you need to act quickly. Water expands when it freezes, putting pressure on pipe walls (Water Density). This pressure can cause cracks, leaks, and burst pipes that flood your home. Finding the frozen section quickly is your first step toward fixing it.
Where Frozen Pipes Typically Occur
Frozen water lines appear most often in unheated spaces. Basements, attics, crawl spaces, and exterior walls are common trouble spots. Pipes near outside doors and windows freeze faster because cold air reaches them easily. Garages and sheds without insulation are also vulnerable.
Pipes running through cabinets under sinks freeze frequently. The cabinet doors block warm air from reaching the pipes. Corner locations and areas near exterior walls experience more freezing risk than interior spaces.
Visual and Auditory Signs
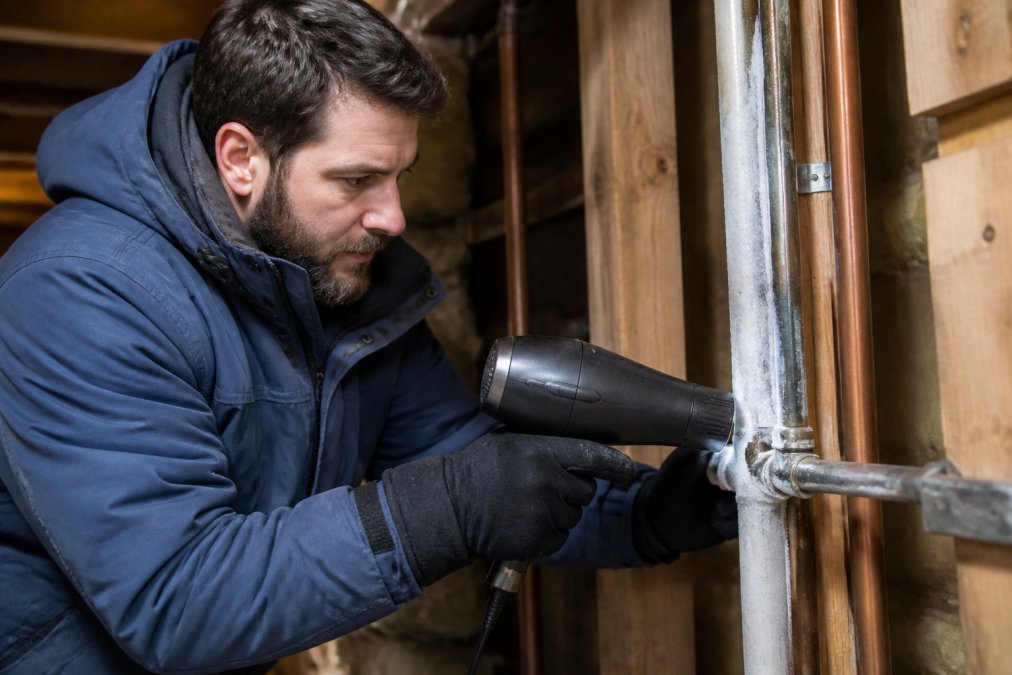
Look for frost or ice buildup on the outside of pipes. White, crystalline coating on metal pipes signals freezing. You might also see condensation that's turned to ice.
Listen for warning sounds. A hissing or whistling noise from a faucet means water is trying to flow through a narrow ice blockage. No water coming out at all is the clearest sign.
Check for these visual clues:
- Frost coating on exposed pipes
- Bulging or swollen pipe sections
- Visible cracks in pipe material
- Water stains below pipe connections
- Condensation that freezes solid
Tools and Equipment for Thawing Frozen Pipes
Applying heat safely requires the right equipment. Wrong tools can damage pipes, start fires, or cause burns. Knowing what to use and what to avoid protects your home and your safety.
Safe Heat Application Methods
Electric heating pads work well for accessible frozen pipes. They distribute heat evenly without extreme temperatures. Wrap the pad around the pipe and secure it with tape. Check the pipe every 15 minutes.
Hair dryers provide controlled, gentle heat. Hold it 6 inches from the pipe and move it back and forth. Never stay in one spot too long. This method takes patience but works safely on most pipe materials.
Hot water towels are simple and effective. Soak towels in hot water, then wrap them around the frozen section. Replace them every 10 minutes as they cool. This low-risk approach suits plastic and copper pipes equally well.
Heat tape designed for pipes offers consistent warming. Wrap it around the frozen area following product instructions. Plug it in and let it work. Most heat tape takes 30 minutes to thaw a frozen section.
Infrared heaters work from a distance. Position one 3-4 feet from the pipe and let it run. These heaters warm the surrounding air, which thaws the pipe gradually. They're safer than direct flame methods.
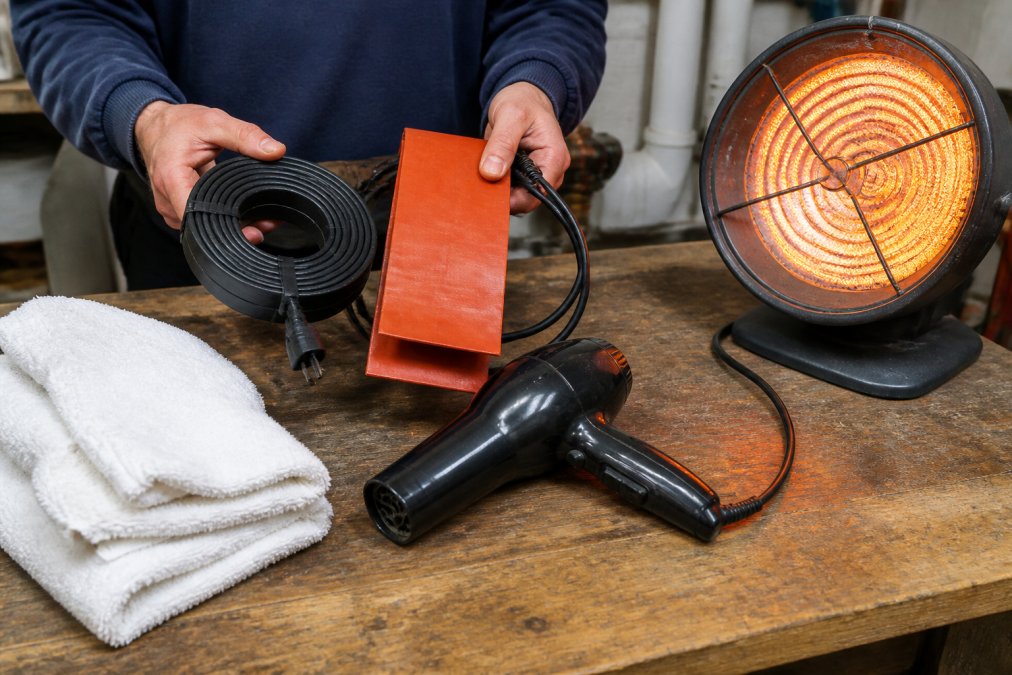
Safe thawing tools compared:
| Tool | Heat Level | Best For | Time Required |
|---|---|---|---|
| Electric heating pad | Low-medium | Accessible pipes | 20-40 minutes |
| Hair dryer | Low | Delicate pipes | 30-60 minutes |
| Hot water towels | Medium | Quick fixes | 15-30 minutes |
| Heat tape | Medium | Long sections | 30-45 minutes |
| Infrared heater | Medium | Large areas | 45-60 minutes |
What Not to Use
Never use a blow torch or open flame near pipes. These create extreme heat that can damage pipe material, melt insulation, and start fires. One slip means disaster.
Avoid propane heaters indoors. They consume oxygen and release carbon monoxide, creating a serious safety hazard in enclosed spaces.
Don't use boiling water directly on plastic pipes. The extreme temperature can warp or crack them. Hot water from a kettle is safer than boiling water poured straight from the pot.
Never apply heat to pipes you can't see clearly. Hidden pipes behind walls or in tight spaces can overheat without you knowing. Fire risk increases dramatically.
Skip soldering torches and welding equipment. These tools reach temperatures that ignite nearby materials and damage pipe integrity beyond repair.
Step-by-Step Process to Thaw Frozen Pipes Safely
Before You Begin: Safety Preparation
Turn off the main water shut-off valve before starting. This prevents water damage if a pipe bursts during thawing. Locate your main valve now, before you need it in an emergency. Most homes have one in the basement, crawl space, or near the water meter.
Open faucets in the affected area. This relieves water pressure and lets steam escape as ice melts. Turn on both hot and cold taps. Leave them running throughout the thawing process.
Prepare towels and buckets. Melting ice releases water. Catch it before it floods your floor. Position buckets under pipes and lay towels underneath.
Wear safety glasses and gloves. Escaping steam can burn skin. Broken pipe fragments may have sharp edges.
Thawing Steps by Pipe Location
For exposed pipes in basements or crawl spaces:
Start at the faucet end of the frozen section. Heat works best when water can flow toward the open faucet. Begin thawing at the point closest to where water needs to go.
Apply your chosen heat source. Use an electric heating pad or hair dryer. Move heat back and forth along the pipe. Never concentrate heat in one spot for more than 30 seconds.
Work your way along the frozen section toward the main water line. Progress slowly. Patience prevents pipe damage.
Check for water flow every 10 minutes. When water starts moving, you've broken through the blockage.
For pipes in walls or cabinets:
Open cabinet doors under sinks completely. This lets warm room air reach the pipes inside.
Apply heat to the exterior of the cabinet. Use an infrared heater or heating pad on the cabinet's outer wall. The heat penetrates through the cabinet to warm pipes inside.
If you have access from behind the wall, apply heat there instead. Drill a small hole if needed to reach the pipe directly.
This method takes longer because heat must travel through materials. Give it at least 45 minutes before assuming it's not working.
For pipes near windows and exterior walls:
Close curtains and blinds to trap warm air. This creates a warmer microclimate around the pipe.
Apply heat tape or a heating pad directly to the pipe. Secure it firmly with electrical tape.
Let the heat work for at least 30 minutes. Check progress by testing water flow at the nearest faucet.
Thawing Pipes in Inaccessible Areas
Pipes frozen inside walls create real challenges. You can't see them or reach them easily. But you have options.
Use an infrared heater outside the affected wall. Position it close to the wall surface. The heat penetrates inward, warming the pipe gradually. This takes longer than direct methods. Plan for 60-90 minutes.
Call a professional plumber if the frozen section stays inaccessible. Professionals have specialized equipment. They can use pipe thawing machines that detect frozen sections and apply targeted heat. They also have tools to reach pipes in tight spaces.
Never drill randomly into walls to reach frozen pipes. You might hit electrical wiring or damage the pipe further.
Signs of Frozen Pipes You Should Not Ignore
No water coming from a faucet during cold weather signals a frozen pipe. Don't assume it's a water supply problem. Check if other faucets work. If only one area lacks water, you likely have a frozen section.
Hissing or whistling sounds from pipes mean ice is partially blocking water flow. The sound comes from water forcing through a narrow gap. This is your warning sign. Thaw the pipe before pressure builds and causes a burst.
Visible frost on pipes is an obvious indicator. Crystalline ice coating means freezing has started. Act immediately.
How to Prevent Pipes from Freezing
Prevention costs far less than emergency thawing and repairs. Taking action before winter arrives protects your home and saves money.
Winterization and Insulation Strategies
Insulate exposed pipes with foam pipe insulation. This material wraps around pipes and slows heat loss. It's cheap and takes minutes to install. Most hardware stores carry it in 6-foot sections.
Emergency Preparedness
Know where your main water shut-off valve is located. Practice turning it off. In a burst-pipe emergency, you need to stop water flow immediately. Every second counts.
When to Call a Professional Plumber
Some situations require professional help. Knowing when to call saves time and prevents damage.
Post-Thaw Inspection and Documentation
After thawing, inspect the pipe carefully. Look for cracks, bulges, or water leaks. Even small damage can cause problems later.
Frequently Asked Questions
What tools do professionals use to thaw frozen pipes safely?
Professional plumbers typically use heat tape, infrared heaters, and pipe thawing machines to safely apply controlled heat to frozen water lines. For accessible pipes, they may use electric heating pads or hot water towels. Professionals avoid open flame methods and always monitor pipe temperature to prevent damage. The choice depends on the pipe material and location, copper responds differently than PVC or galvanized steel.
How long can pipes be frozen before they burst?
Frozen pipes can burst within 24 to 48 hours of freezing, depending on water pressure and pipe material. Once ice forms inside the pipe, thermal expansion creates pressure that weakens the pipe walls. Thin-walled pipes and older plumbing systems are more vulnerable. The risk increases significantly after 48 hours, making rapid thawing essential to prevent pipe rupture and water damage to your home.
What are the main signs of frozen pipes in my home?
Common signs include no water flow from faucets, reduced water pressure, frost or ice visible on exposed pipes, and unusual sounds like gurgling or banging in the walls. You may also notice water backing up or pooling near the affected area. If multiple faucets have no water, your main water shut-off valve or supply line is likely frozen. Act quickly, these signs indicate ice blockage that needs immediate attention.
Should I leave faucets dripping to prevent pipes from freezing?
Yes, leaving faucets dripping slightly can help prevent frozen pipes by maintaining water movement through the lines. Moving water is harder to freeze than standing water, and the faucet pressure release reduces thermal expansion stress. During extreme cold, open one or two faucets, both hot and cold, to a slow drip. This simple step is one of the most effective emergency preparedness measures for homeowners in cold climates.