 ultimate-guide
Gas Pipe Installation Safety Standards: 2026 Guide
Table of Contents
- Why Gas Pipe Installation Safety Standards Matter
- Core Codes and Regulatory Standards for Gas Piping
- Residential Gas Line Pressure Testing Procedures
- Underground Gas Piping Installation Depth and Trenching Rules
- Materials, Fittings, and Corrosion Protection
- Hiring a Licensed Gas Piping Professional
- Leak Detection, Inspection, and Emergency Response
- Conclusion
- Frequently Asked Questions
Last Updated: September 16, 2026
Why Gas Pipe Installation Safety Standards Matter
Gas pipe installation safety standards exist because natural gas is unforgiving of shortcuts. A single improperly threaded fitting or a trench backfilled too soon can turn a routine appliance hookup into a leak, a fire, or a carbon monoxide event. This guide from England's Plumbing & Heating translates the code language contractors cite and homeowners rarely see into plain, actionable steps.
Core Codes and Regulatory Standards for Gas Piping
Two documents govern nearly every residential gas piping job: NFPA 54, the National Fuel Gas Code, and the International Fuel Gas Code (IFGC). Local jurisdictions adopt one or both, sometimes with amendments, which is why the same pipe size can pass inspection in one township and fail in the next.
NFPA 54 and the International Fuel Gas Code
NFPA 54 sets the baseline for pipe sizing, materials, clearance to combustibles, and ventilation requirements. The IFGC covers similar ground but is written for adoption into building codes, so it often carries the specific trenching and burial depth figures inspectors enforce. When the two conflict, the locally adopted code wins.
ASME Standards for Pipe and Fittings
ASME standards define how pipe, fittings, and threading must be manufactured and rated. Schedule 40 black steel remains the default for above-ground residential runs, and every fitting must carry a pressure rating that meets or exceeds the system's design pressure. Using unrated or mismatched fittings is one of the most common inspection failures.
Residential Gas Line Pressure Testing Procedures
Residential gas line pressure testing procedures require sealing the system, pressurizing it with air or inert gas, and holding that pressure long enough to prove there are no leaks before gas is introduced. The test is the single gate that stands between a completed rough-in and gas flowing through the pipe, which is why inspectors treat the documented result as the most important page in the job file.
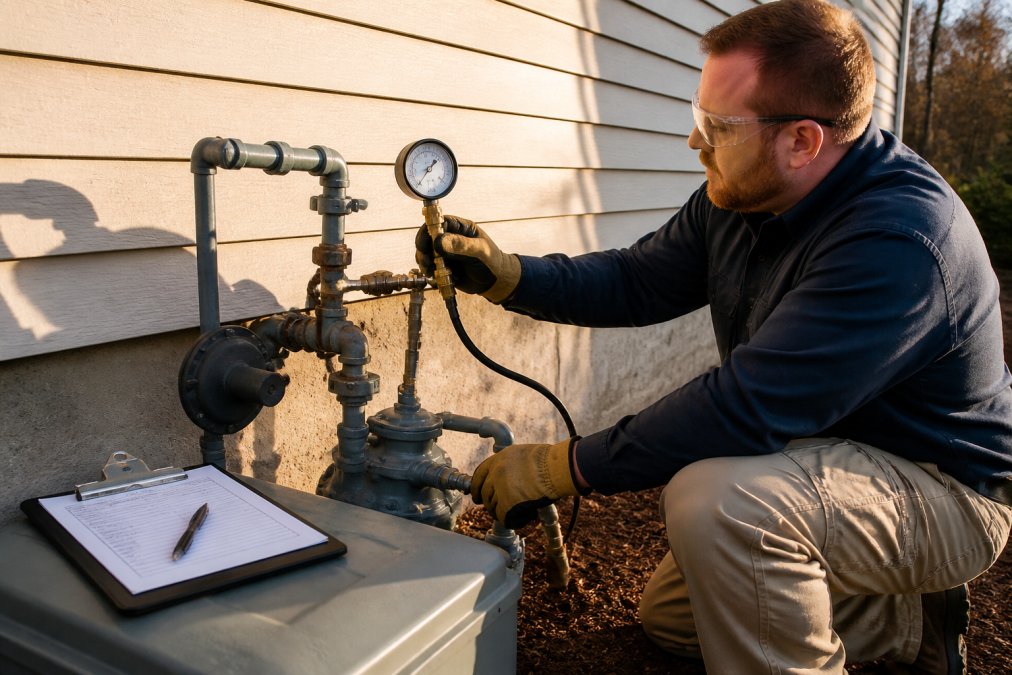
- NFPA 54 / IFGC-style rough-in test: pressurize the piping to at least 1.5 times the maximum operating pressure, with a minimum of 3 psi for systems under 1/2 psi operating pressure, held for at least 10 minutes with no drop.
- Higher-pressure or longer-duration tests: some jurisdictions require 10 psi or more held for 30 minutes, and a few require a full hour for larger systems or when the inspector wants a longer observation window.
The steps follow a fixed order:
- Isolate the system and cap all openings, including appliance connectors and valve outlets
- Connect a calibrated pressure gauge at the highest point in the run, with a second gauge at the source if the code requires it
- Pressurize with air or nitrogen to the required test pressure
- Hold the pressure for the full required duration with the source valved off
- Record the reading and inspect every joint with leak detection solution
- Document results, starting pressure, ending pressure, hold time, gauge ID, and tester name, for the inspector before introducing gas
Post-Installation Inspection Checklist
Most guides stop at "call an inspector." The more useful move is knowing what a compliant installation looks like so you can verify the work before the inspector arrives, and so you have a record if something is wrong. Walk the job with this list:
- Pressure test passed and documented with starting pressure, ending pressure, hold time, and gauge readings
- Every joint checked with leak detection solution, including the meter outlet and appliance connectors
- Pipe supports spaced per code and clearances to combustibles verified (commonly 6 inches from flue vents and 1 inch from other combustibles, but confirm locally)
- Shut-off valve accessible, clearly labeled, and operable without tools
- Sediment trap installed at the appliance where required
- Ventilation and combustion air adequate for the appliance served
- Underground portions bedded properly, with warning tape installed above the pipe
- Permit inspection signed off by the local authority, with the inspection card left on site
- Homeowner shown the shut-off location and the emergency procedure
Underground Gas Piping Installation Depth and Trenching Rules
Underground gas piping installation depth is set by local code, and most jurisdictions require a minimum cover of 12 to 18 inches for residential runs, with deeper burial under driveways or where vehicles pass. Trenching must keep the pipe bedded on stable, debris-free soil with no rocks pressing against the coating.
Call 811 Before You Dig
Every underground job starts with a call to 811, the national call-before-you-dig service. Utility locators mark existing gas, electric, water, and communications lines, usually within a few business days of the request. Digging without those marks is the leading cause of accidental gas line strikes, and it is illegal in most states.
Materials, Fittings, and Corrosion Protection
Material selection drives how long a gas system lasts. Black steel and wrought iron remain the standard for above-ground residential piping, while polyethylene and coated steel are common underground. Every material must be rated for gas service and compatible with the fittings it connects to.
Material Compatibility Guide
| Material | Best Use | Key Consideration |
|---|---|---|
| Black steel | Above-ground runs | Requires threading and joint compound rated for gas |
| Wrought iron | Above-ground, high pressure | Heavier, more corrosion-resistant than steel |
| Polyethylene | Underground burial | Needs transition fittings at each end |
| Coated steel | Underground, high-traffic areas | Coating must survive backfilling intact |
Threading must be clean and free of cutting burrs. A burr left inside a fitting restricts gas flow and creates a turbulence point where leaks begin.
Cathodic Protection and Casings
Cathodic protection uses a sacrificial anode to divert corrosion away from metallic pipelines, extending service life in soil with high moisture or salt content. Casings, rigid sleeves placed around pipe where it crosses under roads or foundations, protect the line from shifting loads and let inspectors verify the pipe inside without excavating.
Skipping cathodic protection on coated underground steel is a common cost-cutting mistake. The coating eventually develops pinholes, and without an anode, corrosion concentrates at those points and can perforate the pipe years before its expected service life.
Hiring a Licensed Gas Piping Professional
Hiring a licensed gas piping professional is not optional in most jurisdictions. Gas work typically requires a specific license or certification beyond a general plumbing license, and permits must be pulled before work begins. An unpermitted job can void insurance coverage and complicate a home sale years later.
- The permit is the record. A pulled permit creates an inspection trail. Without it, there is no independent verification that the work met code, and a future buyer's inspector or lender may flag the unpermitted work as a defect.
- Insurance can deny the claim. Most homeowner policies exclude damage from work the homeowner performed without a permit or license. If a leak causes a fire, the insurer can point to the unpermitted installation and decline coverage, leaving the homeowner personally exposed.
- The contractor's bond and insurance shift the risk. A licensed contractor carries general liability and workers' comp. If a technician is injured or a leak damages the home, the claim runs against the contractor's policy, not the homeowner's.
DIY vs. Professional Risk Assessment
The honest answer is that most gas piping work is not a DIY job. Threading, pressure testing, and code compliance all carry failure modes that a homeowner cannot see or smell until it is too late.
- Safe to DIY: Nothing involving gas connections, pipe cutting, or pressure testing. Painting, clearing access to the shut-off, and replacing a furnace filter are the realistic homeowner tasks.
- Professional required: Any new run, appliance hookup, leak repair, relocation, or replacement of a gas valve or connector.
- Gray area: Replacing a flexible connector on a stove or dryer. The part is inexpensive and the job looks simple, but many jurisdictions still require a licensed hand, and a cross-threaded connector is a common leak source.
Leak Detection, Inspection, and Emergency Response
Leak detection combines three layers: a pressure test before gas is introduced, an electronic combustible gas detector during commissioning, and soap solution at every joint as a final check. Each layer catches failures the others miss.
Post-Installation Inspection Checklist
- Pressure test passed and documented with gauge readings
- Every joint checked with leak detection solution
- Shut-off valve accessible and clearly labeled
- Pipe supports and clearances to combustibles verified
- Ventilation adequate for the appliance served
- Permit inspection signed off by the local authority
- Homeowner shown the shut-off location and emergency procedure
Emergency response procedures are simple and non-negotiable. If you smell gas, leave the building, avoid using phones or switches inside, and call your utility's emergency number from a safe distance. Once the utility secures the line, a licensed professional should inspect and repair before service resumes.
Conclusion
Gas piping failures rarely announce themselves in advance, which is exactly why the standards exist. If you are planning a new run, an appliance hookup, or a repair, the safest path is a licensed professional who pulls the permit, pressure tests the system, and documents the inspection.
Frequently Asked Questions
What are the primary safety regulations for residential gas piping?
Residential gas piping in the U.S. follows NFPA 54 (National Fuel Gas Code) and the International Fuel Gas Code, which most states and local jurisdictions adopt with amendments. These rules cover pipe material, sizing, support spacing, pressure testing, ventilation, and shut-off valve placement. Your local building department enforces the version it has adopted, so requirements can vary by county. Always confirm with your authority having jurisdiction before starting work.
Are there specific depth requirements for underground gas piping?
Yes. NFPA 54 and the International Fuel Gas Code generally require buried gas piping to sit at least 12 inches below grade, and deeper in some jurisdictions or under driveways and roads. Piping must also be installed below the frost line where freezing is a concern. Local amendments can raise the minimum, so check with your building department before trenching.
Should a gas pipe be sleeved through a wall?
Yes. When gas piping passes through a masonry wall, foundation, or exterior wall, code requires a sleeve or casing to protect the pipe from abrasion, corrosion, and structural movement. The sleeve must be sealed on the outside to prevent water and gas from entering the building. This is a common inspection failure point, so verify the sleeve material and sealing method with your inspector.
What are the risks of improper gas line installation?
Improper installation can cause leaks that lead to fire, explosion, or carbon monoxide exposure. Common problems include undersized piping that starves appliances, missing sleeves, inadequate pressure testing, poor threading that leaves burrs, and buried joints without cathodic protection. Symptoms of a leak include a gas odor, hissing near appliances, or dead vegetation over a buried line. If you notice any of these, leave the area and call your gas utility.
How do professionals ensure gas lines are leak-free during installation?
Technicians perform a pressure test by sealing the line, pressurizing it with air or nitrogen, and monitoring the gauge for a set period, typically 10 to 30 minutes depending on the jurisdiction and test pressure. Any drop indicates a leak. After the test passes, they check every joint with soapy water or an electronic detector and purge the line before lighting appliances. Documentation of the test is often required at inspection.
What role does the NFPA 54 code play in gas pipe installation?
NFPA 54, also called the National Fuel Gas Code, is the primary national standard for gas piping, appliance connections, venting, and combustion air. It sets minimum requirements for pipe sizing, materials, support, pressure testing, and shut-off valves. Most state and local codes either adopt NFPA 54 directly or mirror it through the International Fuel Gas Code. Compliance with NFPA 54 is the baseline inspectors check against.
How do I hire a licensed gas piping professional?
Verify the contractor holds a current state or local license for gas work, carries liability insurance and workers' compensation, and can show permits for past jobs. Ask for references from similar residential projects and confirm the technician will pull the required permit, since unpermitted gas work can void insurance and fail at resale. Get a written scope that names the pressure test, inspection, and any required sleeving or cathodic protection.