 how-to
7 Steps to Prime a Well Pump After Repair
Last Updated: October 26, 2026
Quick Summary
To prime a well pump after repair, turn off power at the breaker, remove the prime plug on top of the pump casing, and fill the casing with water from a garden hose until water overflows from an open release valve. Reinstall the plug, restore power, and check that water flows from a faucet within 10 to 30 seconds.
- The prime plug is a threaded cap on top of the pump casing for jet pumps, usually brass or plastic.
- Fill the pump casing slowly with water until it overflows from the release valve, indicating air has been pushed out.
- Deep-well pumps follow the same priming steps as shallow-well pumps but take longer because water must travel farther up the suction line.
- Water should flow from a faucet within 10 to 30 seconds after restoring power to a properly primed pump.
- Air leaks in the suction line are the most common reason a pump won't prime or keeps losing prime after repair.
Table of Contents
- Why Your Well Pump Needs Priming After Repair
- Identifying Your Pump Type Before You Start
- Safety First: Isolating Power and Pressure
- Step-by-Step: How to Prime a Well Pump After Repair
- How to Prime a Deep Well Pump
- What to Do When Your Well Pump Won't Prime After Replacement
- How to Get Air Out of a Well Pump
- Why Your Well Pump Keeps Losing Prime
- Frequently Asked Questions
Why Your Well Pump Needs Priming After Repair
When a well pump loses its prime, it can't move water from your well to your home. This happens because air gets into the pump casing during repair work. The pump needs water inside it to operate.
After you replace or repair a pump, priming is your first step. It refills the pump casing with water and removes trapped air. This restores the seal that lets the pump do its job.
The good news: you can often handle it yourself.
Identifying Your Pump Type Before You Start
Your pump type determines where the prime plug sits and how you'll fill the casing. Learn about different pump categories and how to identify which type you have
Shallow-Well vs. Deep-Well Pumps
Shallow-well jet pumps sit above ground and pull water from wells under 25 feet deep.
Deep-well jet pumps also sit above ground but use a drop pipe and foot valve to reach water 25 to 110 feet down. The prime plug location is the same: on top of the casing.
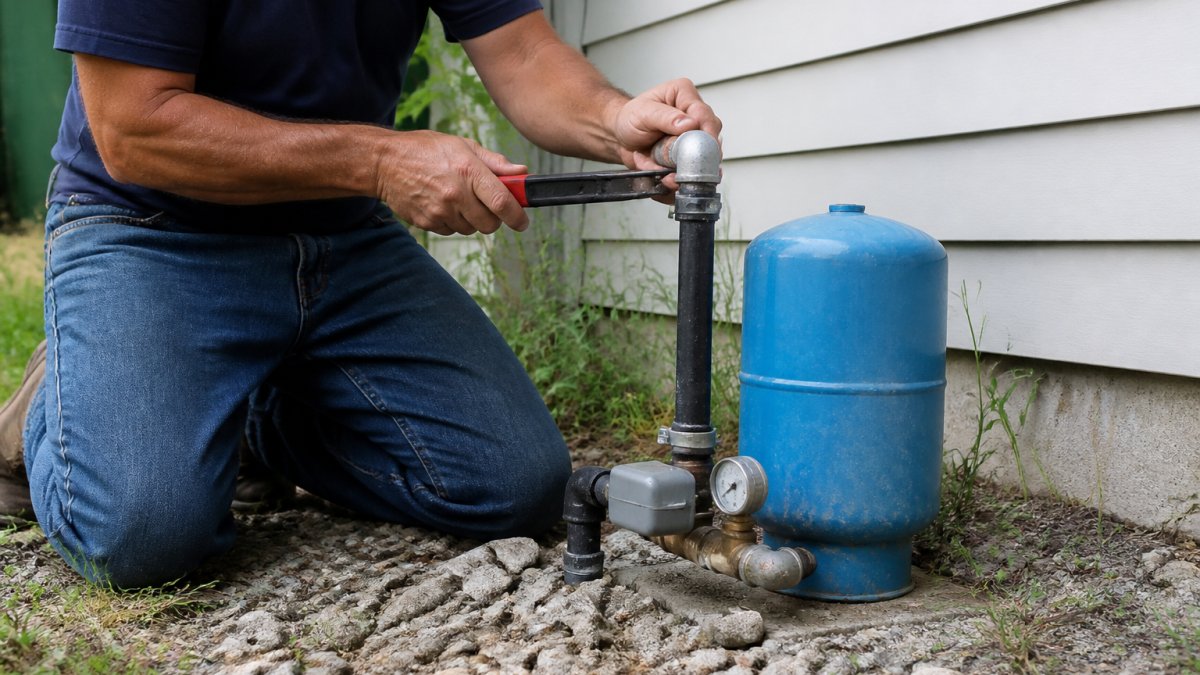
Both jet pump types have a pressure tank nearby. That tank stores water under pressure and helps maintain steady flow to your home.
Submersible Pumps
Submersible pumps sit underwater inside the well casing. They don't have a traditional prime plug because they're already surrounded by water.
If you're unsure which type you have, check whether the pump sits above ground or below. You can also look at your pressure tank. Submersible systems often have the tank closer to the well head.
Safety First: Isolating Power and Pressure
Before you touch anything, turn off the pump and release pressure in the system. A running pump can injure you. Pressurized water can spray unexpectedly.
Turn off power at the breaker. Locate your home's electrical panel and flip the breaker labeled for the well pump.
Open a faucet or release valve. This bleeds pressure from the system.
Wait five minutes. This ensures pressure has fully dropped and the pump has stopped completely.
Step-by-Step: How to Prime a Well Pump After Repair
Priming a well pump follows the same basic sequence every time.
Step 1: Turn Off Power at the Breaker
Locate your electrical panel. Find the breaker labeled for the well pump. Flip it to the OFF position. If you can't find a labeled breaker, turn off the main breaker. This ensures the pump won't start while you're working on it.
Leave the breaker off for the entire priming process. You'll restore power only after the pump is fully primed and the plug is reinstalled.
Step 2: Locate and Remove the Prime Plug
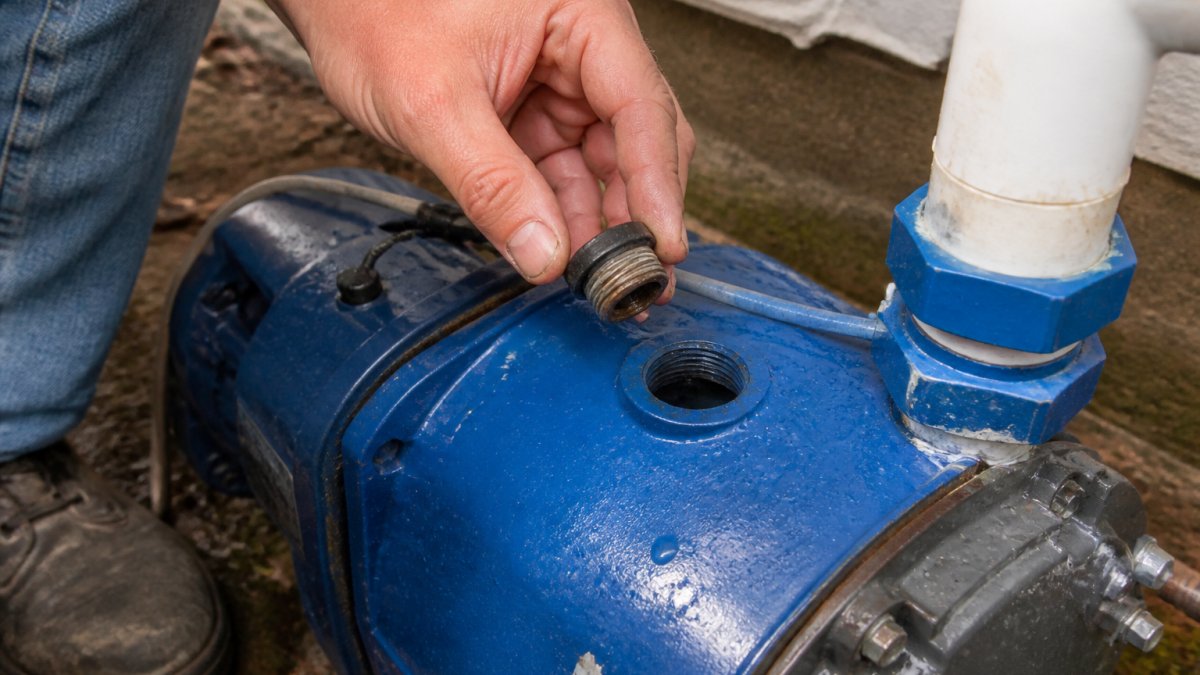
The prime plug sits on top of the pump casing for jet pumps. It's a threaded cap, usually brass or plastic.
Use a wrench or pliers to turn the plug counterclockwise. Remove it slowly. A small amount of water may drip out, which is normal. Keep a bucket underneath to catch any spills.
Set the plug aside in a safe place. Don't lose it. You'll need it to close the pump again.
Step 3: Open Release Valves or Faucets
Locate any release valves on your pressure tank or pump discharge line. These are small brass valves with handles. Turn them counterclockwise to open.
If your system has no release valve, open the faucet closest to the pump. This allows air to escape as you fill the pump.
Leave these valves or faucets open during the entire filling process. Close them only after you've reinstalled the prime plug and restored power.
Step 4: Fill the Pump Casing with Water
Use a garden hose or bucket to pour water into the opening where the prime plug was. Fill slowly.
Pour until water starts to overflow from the release valve or faucet you opened. This means the casing is full and air has been pushed out. Stop pouring at this point.
Watch for air bubbles in the overflow. When bubbles stop and only water flows out, the pump is primed.
Step 5: Reinstall the Prime Plug
Wipe the prime plug threads clean with a cloth. Screw the plug back into the opening by hand first. This prevents cross-threading.
Once hand-tight, use a wrench to turn the plug clockwise until snug. Don't over-tighten. A snug fit is all you need. Over-tightening can crack the pump casing or strip the threads.
Step 6: Restore Power and Restart the Pump
Close any release valves or faucets you opened. Go back to your electrical panel and flip the well pump breaker to the ON position.
The pump should start immediately. You may hear it hum or click as it powers up. Listen for the sound of water moving through the discharge line. This is your sign the pump is working.
Step 7: Check Pressure and Water Flow
Go to the nearest faucet and turn it on. Water should flow within 10 to 30 seconds.
Check your pressure gauge on the pressure tank if you have one. If your gauge reads zero or very low, the pump may have lost prime again.
Let the system run for two to three minutes. This allows the pump to build pressure in the tank. Then check a faucet again. Flow should be steady and strong.
For a more detailed look at pressure testing, check pressure and water flow on your well pump system.
How to Prime a Deep Well Pump
Deep-well pumps follow the same priming steps as shallow-well pumps, but they take longer.
The prime plug location is identical. The filling process is the same. The main change is patience.
Pour water into the casing just as you would for a shallow well. Fill until water overflows from your open release valve.
If water doesn't appear at a faucet within two minutes, the suction line may have an air leak. See the troubleshooting section below.
What to Do When Your Well Pump Won't Prime After Replacement
Sometimes priming doesn't work on the first try. This is frustrating but usually fixable.
Check for Air Leaks in Suction Lines
The suction line is the pipe that carries water from the well to the pump.
Inspect the suction line for visible cracks or splits. Look at all pipe connections. Tighten any loose fittings by hand or with a wrench. Turn fittings clockwise.
If you find a crack, the section must be replaced. A small leak will prevent the pump from building pressure.
For a complete troubleshooting guide, learn how to troubleshoot your well pump systematically.
Inspect Foot Valve and Check Valve Function
The foot valve sits at the bottom of the suction line inside the well. It prevents water from flowing backward when the pump stops.
The check valve sits on the discharge side of the pump. It prevents water from flowing backward into the pump when pressure drops. A failed check valve also causes prime loss.
You can't easily inspect these valves yourself, but you can test their function. After priming and starting the pump, turn off the breaker. Wait 10 minutes.
Verify Water Supply and Suction Side Connections
Make sure your well actually has water. Check with neighbors or your well driller. If the water table has dropped, the well may be dry or nearly dry.
Inspect all connections on the suction side of the pump. Look for loose fittings, cracks, or damage. Tighten any loose connections. If a fitting is cracked, it must be replaced.
Also check the pressure tank. Make sure all connections are tight. A loose fitting on the tank discharge can cause air to enter the system.
| Issue | Check | Fix |
|---|---|---|
| Pump won't build pressure | Suction line for cracks | Tighten loose fittings or replace cracked pipe |
| Water drains after shutdown | Foot valve and check valve | Have valves inspected and replaced if failed |
| No water flow after priming | Well water level and connections | Verify well has water; tighten all fittings |
| Pump cycles on and off | Pressure tank air charge | Have tank pressure tested; may need recharge |
How to Get Air Out of a Well Pump
Air trapped inside the pump casing prevents it from working. Getting air out is the entire purpose of priming.
The most reliable way to remove air is to fill the casing with water and let it overflow.
If air remains after initial priming, repeat the process. Open the prime plug again.
Sometimes air pockets hide deeper in the pump.
You can also help remove air by opening the release valve on your pressure tank after the pump starts.
Why Your Well Pump Keeps Losing Prime
A pump that loses prime repeatedly has a problem beyond the initial filling. Something is letting air back in.
The most common cause is an air leak in the suction line. Cracks develop over time. Connections loosen.
Another cause is a failed foot valve at the bottom of the well.
A third cause is a leaking check valve on the discharge side.
For a complete guide to why this happens and how to stop it, learn what causes a well pump to lose prime.
Frequently Asked Questions
How do I know if my well pump has regained prime?
After restarting the pump, listen for steady water flow from your faucets and check the pressure gauge on your pressure tank. A properly primed pump delivers consistent water pressure, typically between 40-60 PSI. Water should flow smoothly without sputtering or air sounds. If flow is weak or intermittent, the pump may not have regained prime fully and you may need to repeat the priming process.
Why won't my well pump prime after replacement?
A replacement pump often won't prime due to air in the suction line, a faulty foot valve, or loose pipe fittings. Check all connections on the suction side for leaks, ensure the foot valve at the bottom of the well is functioning, and verify the priming plug was fully sealed. If water drains from the pump casing after priming, you likely have an air leak that needs repair before the pump will hold prime.
How much water should I add when priming a well pump?
Fill the pump casing completely until water flows out of the priming port. Most jet pumps require 3-5 gallons, though deep-well pumps may need more. The goal is to eliminate all air from the casing and suction line. Stop filling once water is visible at the priming port, then reinstall the plug. Overfilling won't help, the casing has a fixed capacity.
Can I prime a well pump while it's running?
No. Always turn off power at the breaker before attempting to prime. Priming requires opening the casing and removing plugs, which is unsafe while the pump is operating. Additionally, water added during operation may not reach the casing properly. Once you've filled the casing and reinstalled all plugs, then restore power and restart the pump to complete the priming cycle.
If your pump won't prime after repair, or if it keeps losing prime after you've primed it, England's Plumbing & Heating can help. We've handled hundreds of well pump repairs in Chester County. Our team knows the specific challenges that Chester County wells present. We offer online booking for your convenience and can often diagnose prime loss problems in a single visit. Contact us to schedule an appointment and get your water flowing again.