 how-to
How to Flush a Tankless Water Heater: Step-by-Step Guide
Table of Contents
- Why Flushing Your Tankless Water Heater Matters
- What You'll Need: Tankless Water Heater Flush Kit and Supplies
- How Often to Flush a Tankless Water Heater
- Step-by-Step Flushing Process
- How Long to Flush a Tankless Water Heater
- Can You Use CLR in a Tankless Water Heater
- Common Mistakes to Avoid
- Troubleshooting After Flushing
- Frequently Asked Questions
Last Updated: October 17, 2026
Why Flushing Your Tankless Water Heater Matters
Mineral scale and sediment buildup is the silent killer of tankless water heaters. Hard water deposits accumulate inside the heat exchanger, reducing efficiency and eventually causing system failure. Regular maintenance could prevent expensive repairs.
Flushing removes these deposits before they cause damage by circulating descaling solution through your system to break down scale and flush it out.
Think of it like cleaning the arteries of your home's heating system. A clean system delivers hot water faster and lasts significantly longer.
What You'll Need: Tankless Water Heater Flush Kit and Supplies
You don't need expensive equipment to flush a tankless water heater, but the right kit depends on your model. Valve layouts, port sizes, and approved descalers vary by manufacturer, so check your manual before buying anything.
Essential supplies:
- Submersible pump (1/2 horsepower minimum; some manufacturers specify a flow rate, so confirm in your manual)
- Two hoses rated for the pump's pressure (one inlet, one outlet)
- Bucket or large container (5-gallon is typical)
- Descaling solution (white vinegar or a manufacturer-approved descaler)
- Adjustable wrench or pliers
- Teflon tape
- Towels or rags
- Safety glasses
- Gloves
Optional but helpful:
- Thermometer (to monitor solution temperature)
- Pressure gauge (to check water pressure before and after)
- Hose clamps (to secure connections)
- Water hardness test strips (to set your flushing schedule)
Most hardware stores sell complete flush kits for around $30-$60. White vinegar costs just a few dollars per gallon. The pump is the most important piece, it circulates descaling solution through the heat exchanger under pressure. Gravity alone won't move solution effectively.
Model-Specific Valve Layouts and Shutdown Steps
Before you buy supplies, locate your service valves. Most tankless units have two isolation valves with flush ports, one on the cold-water inlet and one on the hot-water outlet, but layouts differ: some use brass valves with caps, others plastic quick-connect ports, and a few older units have no factory flush ports and need a service valve kit installed by a plumber.
Shutdown steps also vary. Gas models may have a dedicated gas shutoff valve near the unit; electric models may have a breaker lockout requirement. Your manual will specify the exact sequence. If you can't find your manual, search the manufacturer's website by model number before starting.
Descaler Selection: Vinegar vs. Manufacturer-Approved Descaler
White vinegar is mild, safe, and effective for regular maintenance, but it isn't right for every unit. Some manufacturers explicitly approve it; others require a specific descaler or citric-acid product and may void warranty coverage if an unapproved solution is used, so check your manual's maintenance section.
Commercial descalers formulated for tankless systems are stronger and often faster, which helps with heavy scale. Citric-acid solutions are gentler than vinegar alternatives and rinse cleanly. Avoid bleach, harsh chemicals, and undiluted CLR, they can corrode internal components.
Disposal and Rinsing
After circulation, the descaler solution contains dissolved minerals and should be disposed of responsibly. Check local household hazardous waste guidelines; many municipalities allow small quantities to be diluted and poured down a drain, but rules vary.
Rinse the system with fresh water for 10-15 minutes after descaling to remove residual solution. Leftover descaler can affect water taste and, over time, damage components. If you used a commercial product, follow its rinse instructions exactly.
How Often to Flush a Tankless Water Heater
The right interval depends on your water hardness, usage, and manufacturer guidance, not a single universal number. Most manufacturers recommend annual flushing, but hard water and heavy use can shorten that to every 6 months. Soft water and light use may stretch it to 12-18 months.
Test Your Water Hardness First
Before setting a schedule, test your water. Inexpensive test strips are available at hardware stores and give a hardness reading in grains per gallon (gpg). As a general guide:
- Soft: 0-3 gpg, flush every 12-18 months
- Moderately hard: 3-7 gpg, flush annually
- Hard: 7-10 gpg, flush every 6-12 months
- Very hard: 10+ gpg, flush every 6 months
These ranges are practical rules of thumb, not manufacturer specifications. Your manual's maintenance table takes priority.
Factor In Usage
A household with two showers a day stresses the unit less than one with a large family, a hot tub, or frequent laundry. High-demand homes should lean toward the shorter end of the range. If you notice reduced hot-water flow or longer heat-up times, flush sooner regardless of schedule.
Signs Your System Needs Flushing Early
- Reduced hot water flow
- Longer time to reach desired temperature
- Strange noises from the unit
- Error codes on the display
- Visible white or brown residue around connections
If you notice any of these, don't wait for the scheduled date. Flush immediately. Catching scale buildup early prevents costly repairs.
Manufacturer Guidance Overrides General Rules
Some manufacturers specify a maximum interval regardless of water quality; others require more frequent service in hard-water conditions to maintain warranty coverage. Record your flush dates and keep receipts if your warranty requires proof of maintenance. When in doubt, follow the manual.
Step-by-Step Flushing Process
Learning how to flush a tankless water heater takes 45-60 minutes from start to finish. Set aside a full hour to avoid rushing. The process has four main phases: shutting down, connecting equipment, circulating solution, and rinsing.
Step 1: Turn Off Power and Water Supply
Safety first. For electric units, flip the breaker that controls the water heater; for gas units, turn the gas valve to the off position. Wait 5 minutes to let the system cool.
Next, shut off your main water supply. Locate the isolation valve on the cold-water line entering the unit and turn it clockwise until it stops. You should feel resistance.
Why this matters: Pressurized water and electricity don't mix. Turning everything off prevents accidental burns, electrical shock, and water damage.
Step 2: Locate and Connect Service Valves
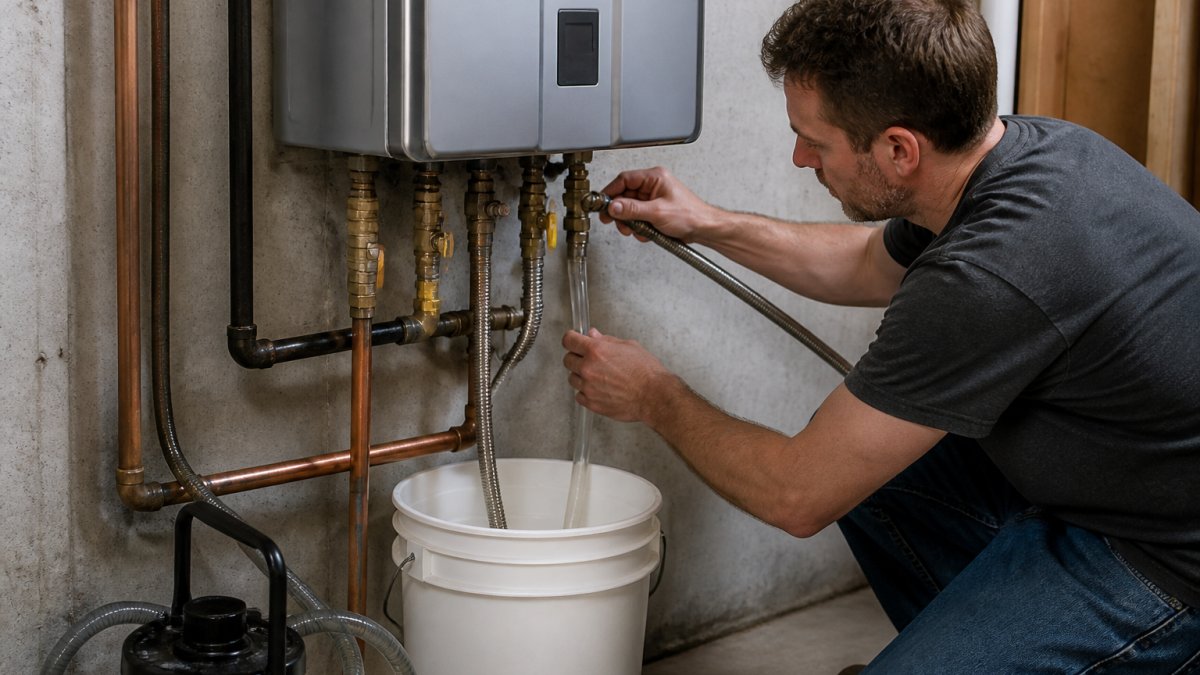
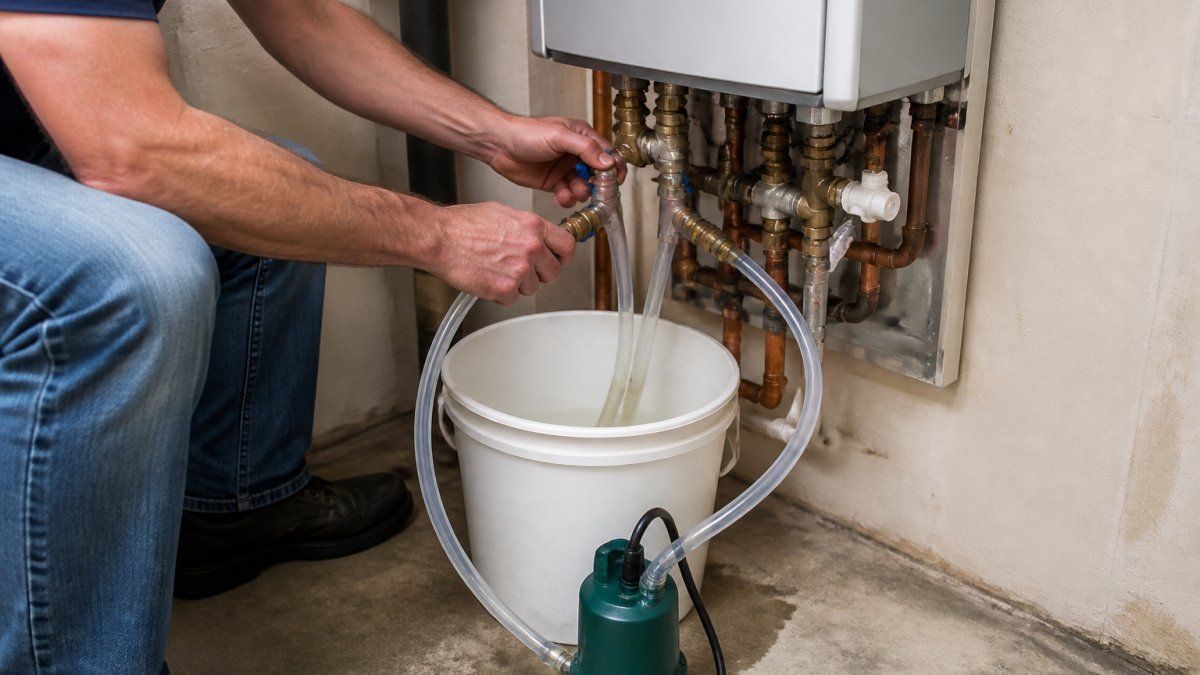
Your tankless water heater has two service valves: one on the cold-water inlet and one on the hot-water outlet.
Look for small brass or plastic valves with ports on the side. They usually have a red cap or label.
Connect one hose to the cold-water inlet valve and the other to the hot-water outlet valve.
Place your bucket or container under the hot-water outlet hose to catch solution during circulation. This prevents a mess on your floor.
Step 3: Circulate Descaling Solution
Pour your descaling solution into the bucket, white vinegar works well for mild scale, while heavy buildup calls for a commercial descaler designed for tankless systems.
Listen for changes in pump noise. If it sounds strained or grinds, stop immediately. This might indicate severe blockage.
What's happening inside: The acidic solution dissolves calcium and magnesium deposits coating your heat exchanger. This restores water flow and heating efficiency.
Step 4: Drain and Rinse the System
After 30-45 minutes of circulation, stop the pump. Drain the descaling solution back into the bucket.
Now refill the bucket with fresh water. Restart the pump and run it for 10-15 minutes to rinse away any remaining vinegar or descaler.
Drain the rinse water. Disconnect the hoses carefully. Use a towel to catch any drips.
Turn your water supply back on slowly. Check all connections for leaks. Turn power or gas back on. Your system is ready.
How Long to Flush a Tankless Water Heater
Total time: 45-60 minutes from start to finish.
Breakdown by phase:
- Shutdown and setup: 10 minutes
- Descaling circulation: 30-45 minutes
- Rinsing: 10-15 minutes
- Reconnection and testing: 5 minutes
First-time flushers often take closer to an hour but move faster once they know where everything is.
Don't rush the circulation phase, the longer solution circulates, the more scale dissolves. Thirty minutes is the minimum and 45 is ideal for heavy buildup. If your system hasn't been flushed in several years, plan on the full 45-60 minute window.
Can You Use CLR in a Tankless Water Heater
CLR is a common household cleaner, but it's not ideal for tankless systems: it's much stronger than white vinegar and can damage internal components if not diluted properly.
Better alternatives:
- White vinegar: Mild, safe, and effective for regular maintenance
- Commercial descalers: Specifically formulated for tankless systems
- Citric acid solutions: Gentler than CLR but still effective
If you've already used CLR, flush thoroughly with fresh water for at least 20 minutes. Rinse until you smell no vinegar or chemical odor.
For future flushes, stick with white vinegar or a product labeled for tankless water heaters. Your manufacturer's manual often recommends specific solutions. Follow their guidance.
Common Mistakes to Avoid
Skipping the shutdown steps. Flushing without turning off power or water is dangerous and ineffective.
Using the wrong solution. Bleach, harsh chemicals, or undiluted CLR can corrode internal parts.
Rushing the circulation phase. Thirty minutes minimum, shorter cycles don't give solution enough time to dissolve scale.
Forgetting to rinse. Leftover descaling solution can damage your system and affect water quality.
Ignoring leaks after reconnection. Check every connection carefully; a small leak now becomes a big problem later.
Troubleshooting After Flushing
Low water pressure after flushing: Your system might still have trapped air.
Strange noises during heating: Air bubbles in the lines cause noise.
Water takes longer to heat than before: You may have introduced small debris during flushing.
Leaking from service valve ports: The connections might not be tight enough.
Discolored water from hot taps: Flushing can stir up old sediment.
If problems persist after troubleshooting, contact England's Plumbing & Heating.
Flushing your tankless water heater is one of the most important maintenance tasks you can do. If you're uncomfortable doing this yourself or encounter problems, England's Plumbing & Heating offers professional flushing and maintenance services.
Frequently Asked Questions
How often should you flush a tankless water heater?
Flush your tankless water heater annually if you have hard water, or every 2-3 years if your water is soft. Hard water accelerates mineral scale buildup in the heat exchanger, reducing efficiency and water flow. Check your manufacturer's instructions for specific recommendations, as some units may require more frequent flushing. If you notice declining water pressure or temperature fluctuations, flush immediately regardless of schedule.
Can you use CLR to clean a tankless water heater?
CLR is not recommended for tankless water heaters. Most manufacturers specify white vinegar or a proprietary descaling solution designed for their units. CLR is stronger and can damage internal components and seals. Always consult your heater's manual before using any chemical. White vinegar is safer and effective for mineral removal in most residential tankless systems.
How long does it take to flush a tankless water heater?
A complete flush typically takes 45-60 minutes for a thorough job, though basic flushing may finish in 30-45 minutes. This includes turning off power and water, connecting hoses, circulating descaling solution, draining, rinsing, and reconnecting everything. The exact time depends on how much mineral buildup is present and your comfort level with the process. Allow extra time if this is your first flush.
Is it safe to flush your own tankless water heater?
Yes, flushing is safe if you follow manufacturer instructions carefully and turn off power and gas before starting. Wear gloves when handling descaling solutions, work in a well-ventilated area, and never force connections. Stop immediately if you hear unusual noises, smell gas, or see leaks. If you're uncomfortable working with plumbing or gas connections, hire a professional to avoid damage or safety risks.